
Create a goal
A goal measures an action you care about, such as creating an account. Choose one precise moment for each event: signup should mean an account was created, not merely that someone opened the signup form.
Before you start
Install website tracking or an app SDK. Have access to the code that performs the action.
Choose an event name
No registration is required. Choose Add goals in the dashboard Goals card or Settings → Events & funnels → Events for the JavaScript, HTML, App SDK and Payments API guides. Website and app guides follow the surfaces configured for your product.
Send a custom event once: Jelto adds its name and property keys to the Events list automatically. New keys on an existing event are discovered too. The list shows what Jelto has received; there is no manual registration form.
Names use lowercase letters, digits, _, :, ., or -, up to 64 characters. Property keys use lowercase letters, digits and underscores, up to 32 characters. A product supports up to 100 custom event names and 20 property keys per event. Built-in and automatic payment goal names are reserved. Never put an email, name or other personal identifier in an event name or property.
Send it after the action succeeds
For a website, add this line to the browser success handler that runs after your server confirms the account was created. The tracker must already have loaded.
window.jelto?.('event', 'signup', { plan: 'pro' })
Optional chaining keeps analytics from breaking signup when a tracker is blocked. It does not queue a call made before the tracker loads. Keep this call in the successful action handler, rather than at module initialization.
In Events settings, expand Send this event to see examples for Browser, Swift, Electron, Tauri and .NET. Match the event name exactly; the screenshot displays an existing demo event.
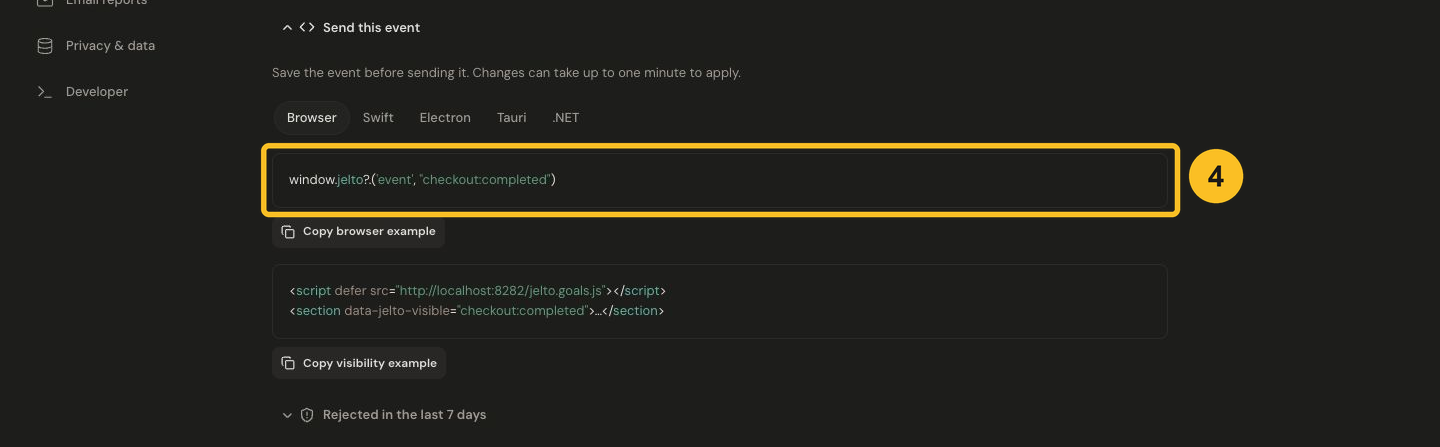
Use the example for your platform after the action succeeds. The example shown uses an existing demo event.
For a button click, use HTML events. For a browser form submission or section appearing on screen, use Forms and visibility. In guided setup's First goal step, Website HTML attribute (no code) under Where the action happens copies click markup such as <a href="/signup" data-jelto-event="signup">Sign up</a>.
Verify and read the result
Perform the action once. Open the dashboard's Goals card, choose a date range including today, and select the event. Use its property breakdown to compare values such as pro and free.
Unique converters and total completions answer different questions: one visitor or install can perform an action repeatedly. See goal details for interpretation.
If it is missing, open Rejected in the last 7 days in Events settings. Check spelling, property limits, reserved names and whether the correct product received it. Follow Event and funnel troubleshooting.
Use the goal elsewhere
Choose it as your KPI, filter by its properties, or add it to a website funnel. Use the event identifier when selecting funnel steps; changing its display name does not change the event sent by your code.
Automatic payment and subscription goals
Connect Stripe, Lemon Squeezy or Polar to receive payment, trial and subscription goals automatically. These goals need no browser event or event registration. Install the checkout helper and forward its metadata to link verified goals to website visits. Linked goals support visitor conversion, website KPI selection, filters and funnel steps. Unlinked payments still count as completions; app payment goals remain completion-only.
The Payments API option is for verified payments from your backend; it does not accept arbitrary server-side visitor events.
Use a goal's display settings to change its label, color, or visibility. Hiding a goal keeps it out of the card without stopping event collection.