
Create a goal
A goal measures an action you care about, such as creating an account. Choose one precise moment for each event: signup should mean an account was created, not merely that someone opened the signup form.
Before you start
Install website tracking or an app SDK. Have access to edit the product's events and the code that performs the action.
Register the event
- Open Settings → Events & funnels → Events → Add event.
- Enter
signupin Event. Names use lowercase letters, digits,_,:,., or-, up to 64 characters. - In Allowed properties, enter
planif you want to distinguish plans. Separate multiple property keys with commas; leave the field empty when none are needed. - Choose Save. Allow up to one minute for the saved event schema to apply.
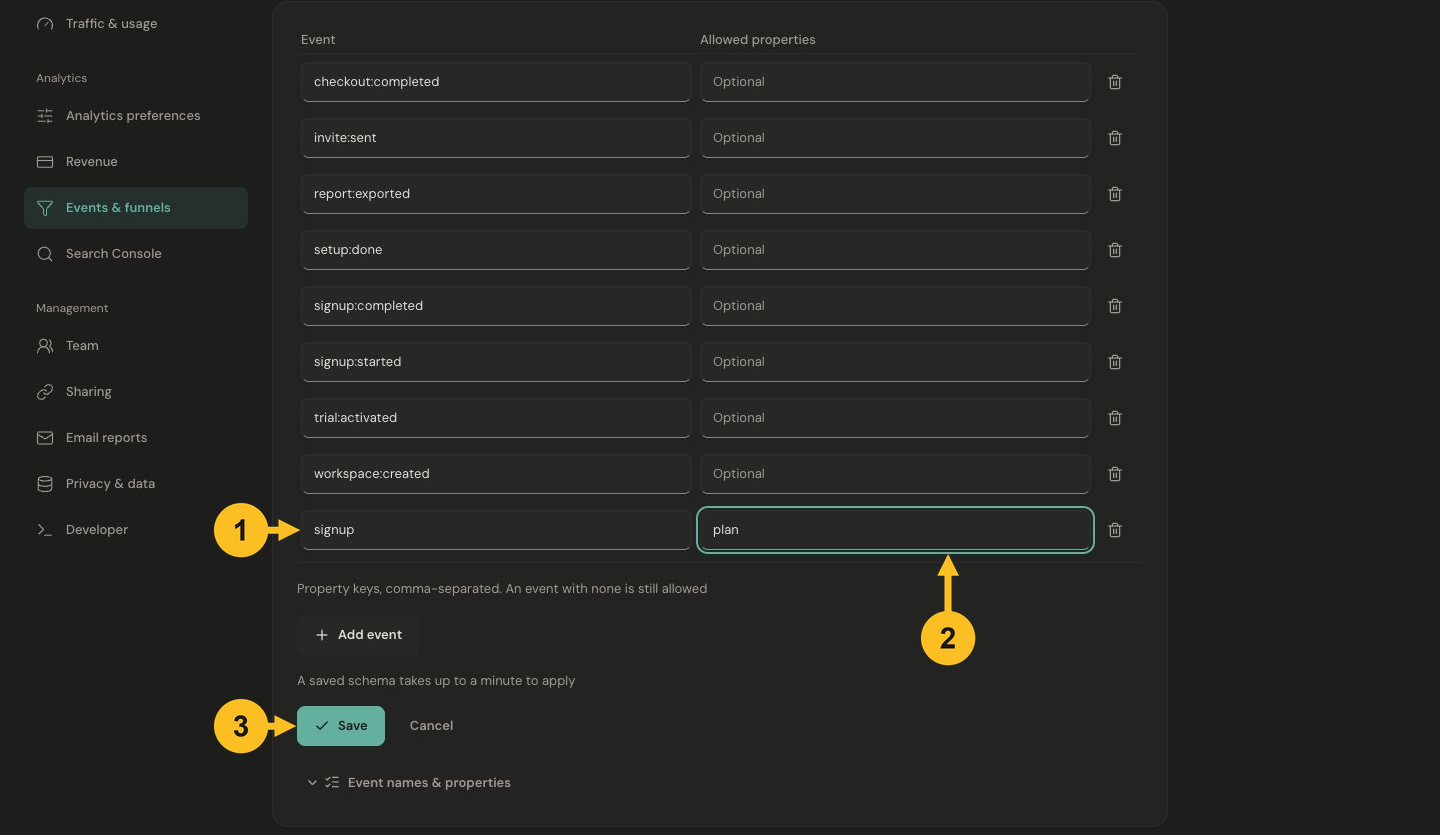
Register an event name and its allowed property keys, then save. This screenshot shows an unsaved signup example.
Property keys use lowercase letters, digits and underscores, up to 32 characters. A product supports up to 100 registered events and up to 20 allowed property keys per event. Built-in event names are reserved. Never put an email, name or other personal identifier in an event name or property.
Send it after the action succeeds
For a website, add this line to the browser success handler that runs after your server confirms the account was created. The tracker must already have loaded.
window.jelto?.('event', 'signup', { plan: 'pro' })
Optional chaining keeps analytics from breaking signup when a tracker is blocked. It does not queue a call made before the tracker loads. Keep this call in the successful action handler, rather than at module initialization.
Expand Send this event to see examples for Browser, Swift, Electron, Tauri and .NET. Match the event name exactly; the screenshot displays an existing demo event.
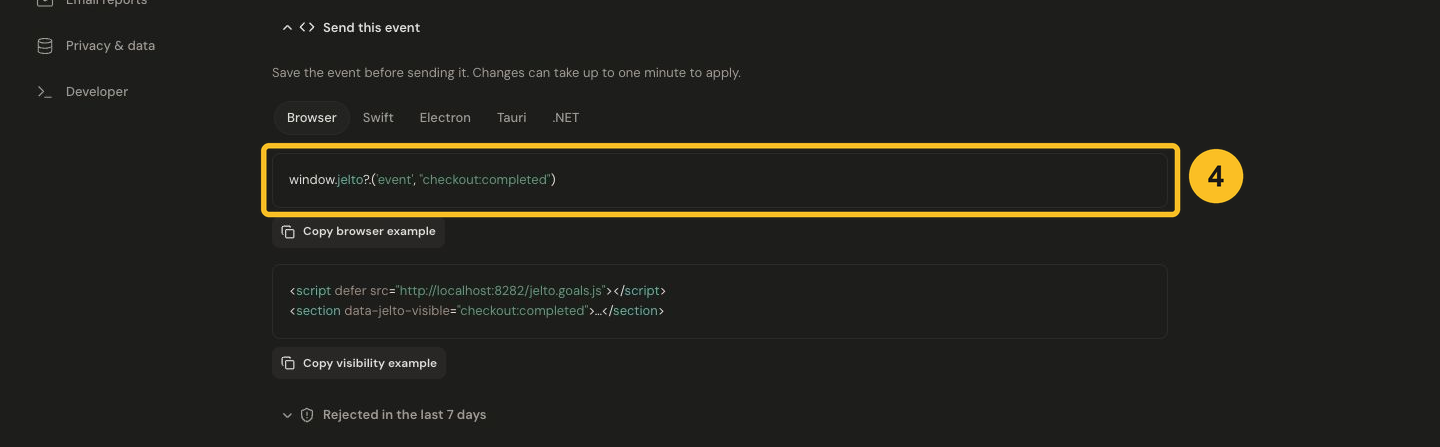
Use the example for your platform after the action succeeds. The example shown uses an existing demo event.
For a button click, use HTML events. For a browser form submission or section appearing on screen, use Forms and visibility.
Verify and read the result
Perform the action once. Open the dashboard's Goals card, choose a date range including today, and select the event. Use its property breakdown to compare values such as pro and free.
Unique converters and total completions answer different questions: one visitor or install can perform an action repeatedly. See goal details for interpretation.
If it is missing, open Rejected in the last 7 days in Events settings. Check spelling, registration, allowed properties and whether the correct product received it. Follow Event and funnel troubleshooting.
Use the goal elsewhere
Choose it as your KPI, filter by its properties, or add it to a website funnel. Before removing a goal used as the KPI, select a replacement KPI.